10 Photography Composition Tips I Use to Improve My Photos

Macro shot of ants working together
Photography composition tips matter more than gear. When a photo feels flat, it’s usually the composition that needs work. I’m still learning every time I step out with a camera, and these are some tips I use to make images that feel stronger, clearer, and more deliberate.
Below are 10 composition techniques I return to again and again - written simply, with quick steps you can try right away.
1. Rule of Thirds - a simple framing trick

Rule of Thirds Grid
Think of your frame as a 3x3 grid. Place the main subject on one of the intersecting points instead of dead center. It’s an easy way to make photos feel balanced.
Turn on gridlines in your camera or phone.
Try the same shot with the subject centered, then on a grid intersection - compare.
Use the grid to plan negative space around the subject.

That Wanaka Tree - Rule of Thirds
To take your use of the rule of thirds to the next level, try experimenting with placing your subject off-center or using the grid to guide your use of negative space. Remember, the rule of thirds is just a guideline, and sometimes breaking it can lead to even more compelling compositions.


2. Leading Lines - guide the viewer’s eye

Leading Lines - lines can be anything from roads, bridges, and railings to natural elements like tree branches or rivers
Lines move the eye through the photo. Roads, fences, shadows, and rows of buildings all work.
Get lower to make lines stronger.
Use diagonals for energy; straight lines for calm.
Let the line lead to your subject or into the scene.


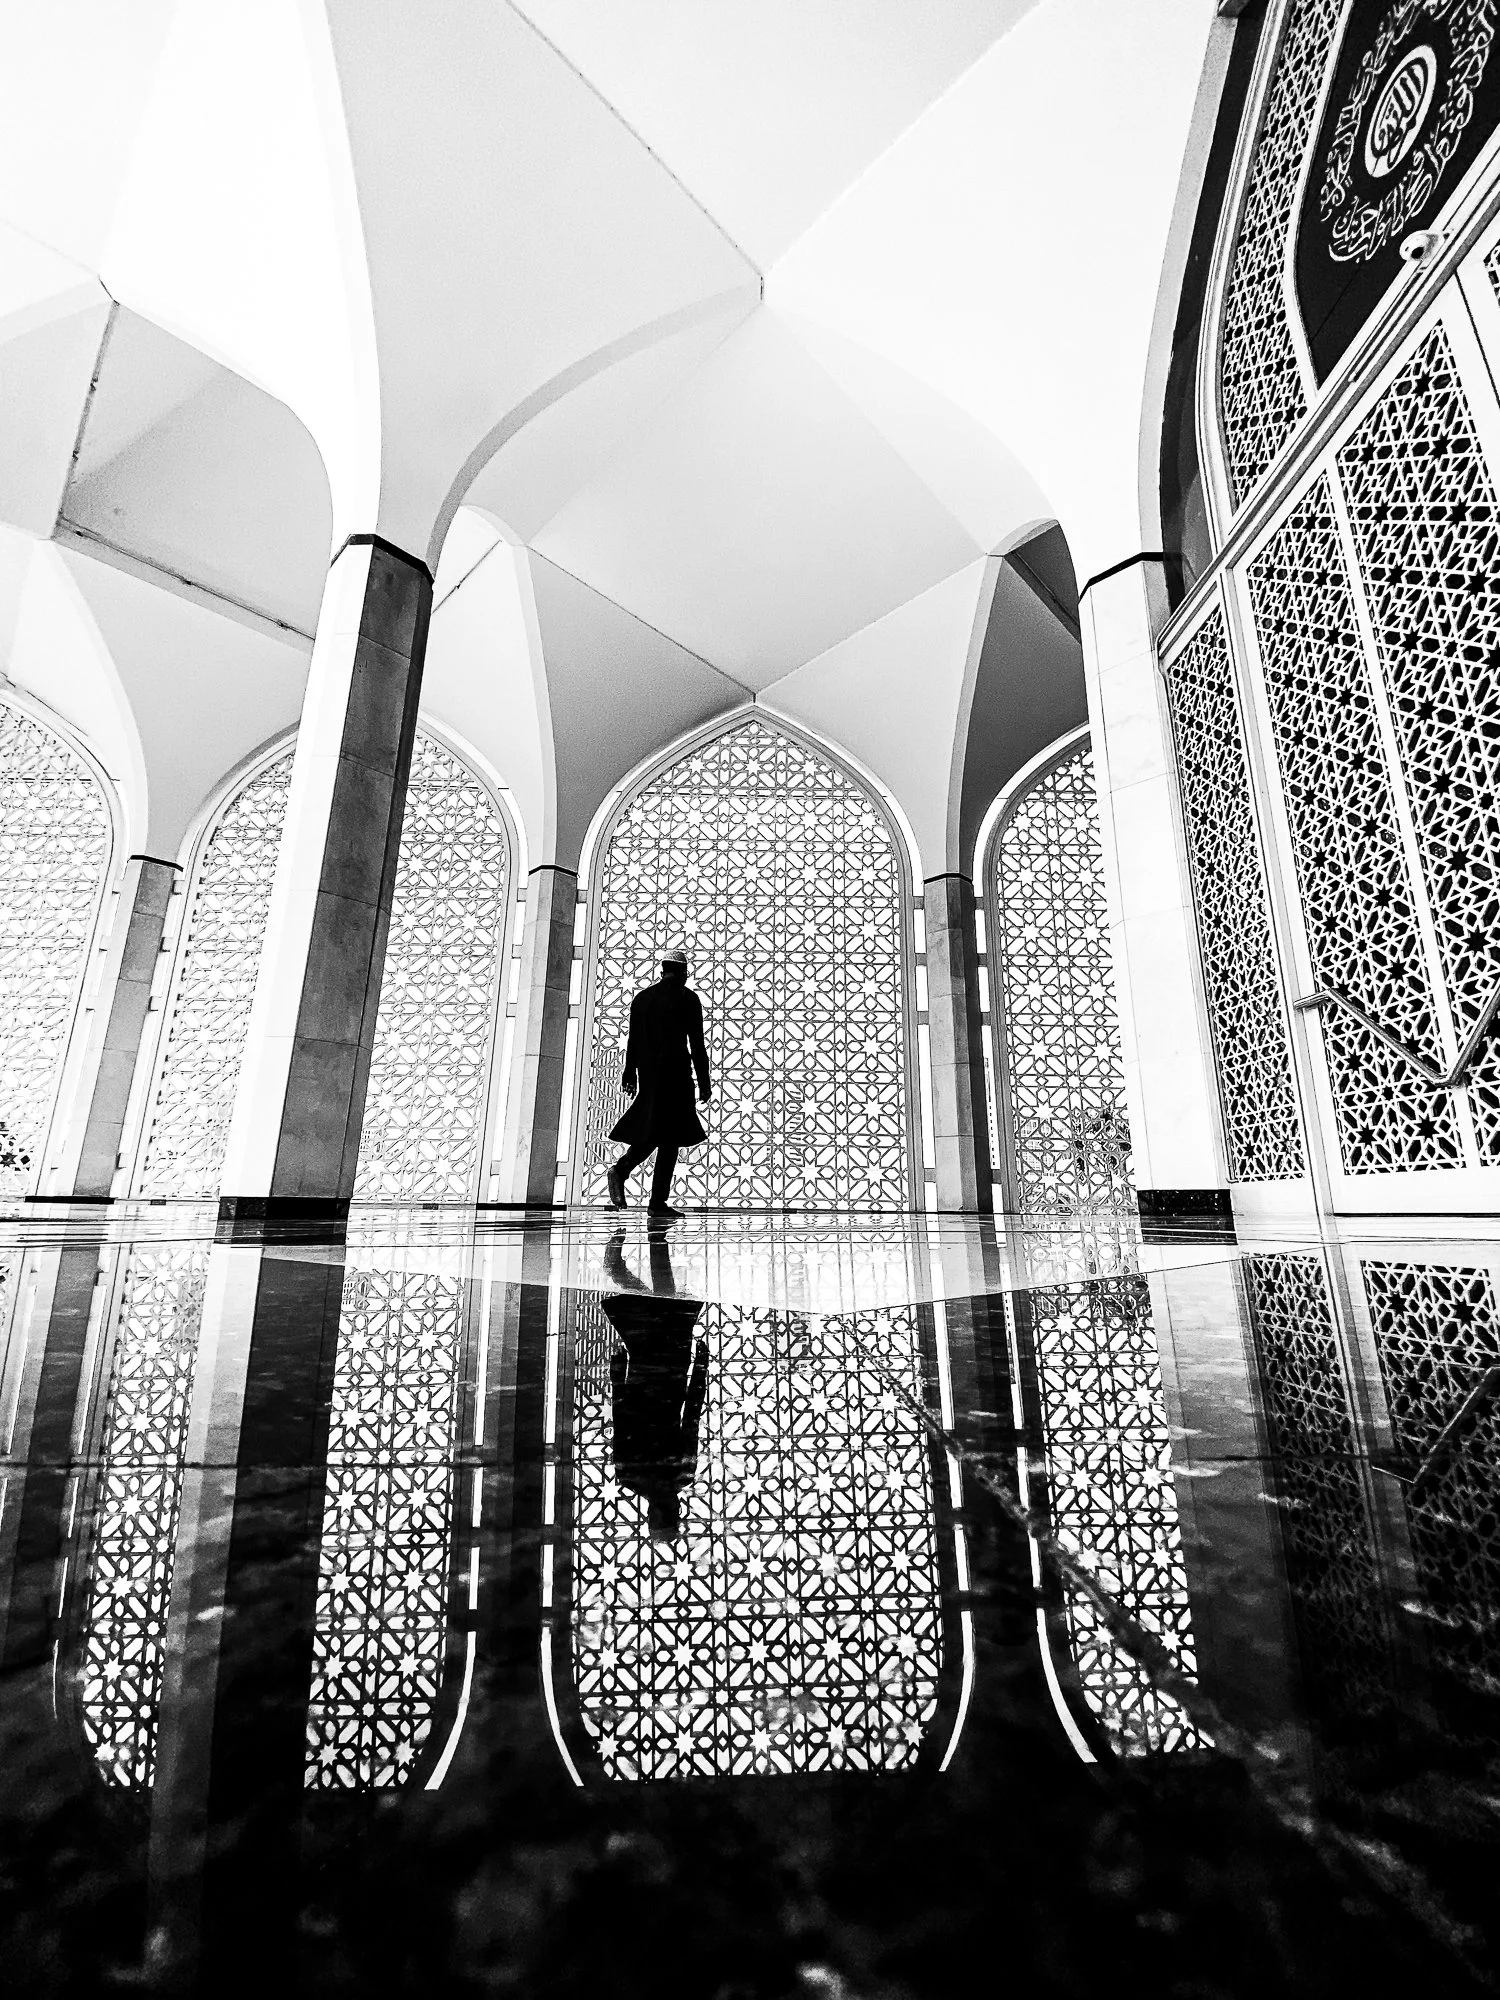
3. Framing - create depth with what’s already there
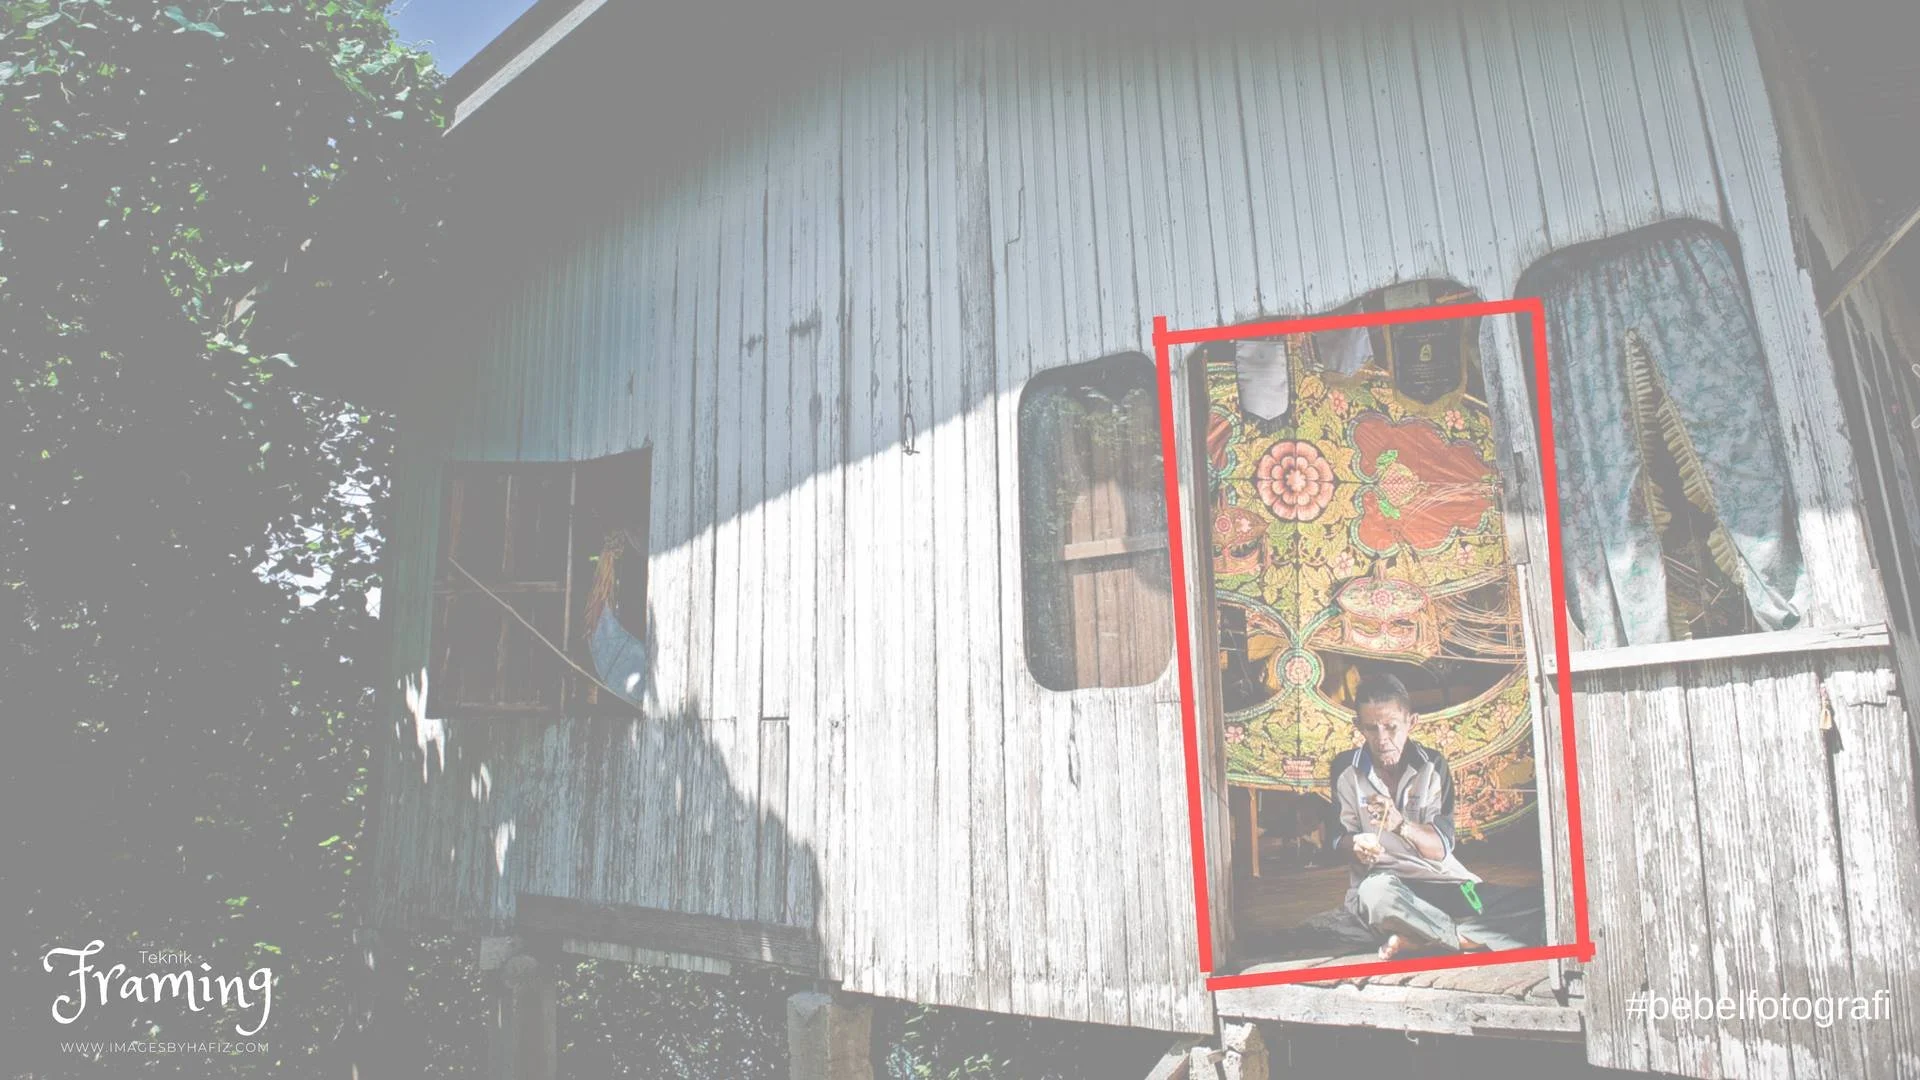
Framing your subject - use elements within the image to create a frame around the subject.
Use doorways, windows, arches, or tree branches to frame your subject. It directs attention and adds context.
Put the frame in the foreground, subject in the midground.
Try partial frames rather than full ones.
Move left or right a little to change how the frame looks.


4. Symmetry - use balance to please the eyes
Symmetry creates a sense of balance and harmony within an image
Symmetry can be powerful - reflections, patterns, and architecture offer easy symmetry.
Center the scene when symmetry is the point.
Hunt for reflections in water or glass.
Slightly off symmetry can create tension you can use.


Remember, symmetry doesn't have to be perfect - it can also be a suggestion of symmetry or a slight variation on a symmetrical pattern.
5. Negative Space - Let the subject breathe

Negative space is the area around the subject of the image that is left intentionally empty.
Empty space can make a subject stronger. A single subject against a plain sky or wall often looks more striking than a crowded frame.
Place the subject off-center with lots of space around it.
Use minimal backgrounds: sky, plain wall, or water.
Negative space works great on phone cameras.


6. Balancing Elements - avoid a lopsided frame
Visual weight is the perceived weight of an object within an image based on factors like color, size, and texture.
If your subject sits on one side, add something on the other to balance visual weight - color, shape, or a small object.
Balance doesn’t mean identical - aim for visual equilibrium.
Use brightness or color as weight, not just size.
Check the crop to see if the image still feels stable.


7. Golden Ratio - a natural flow for the eye
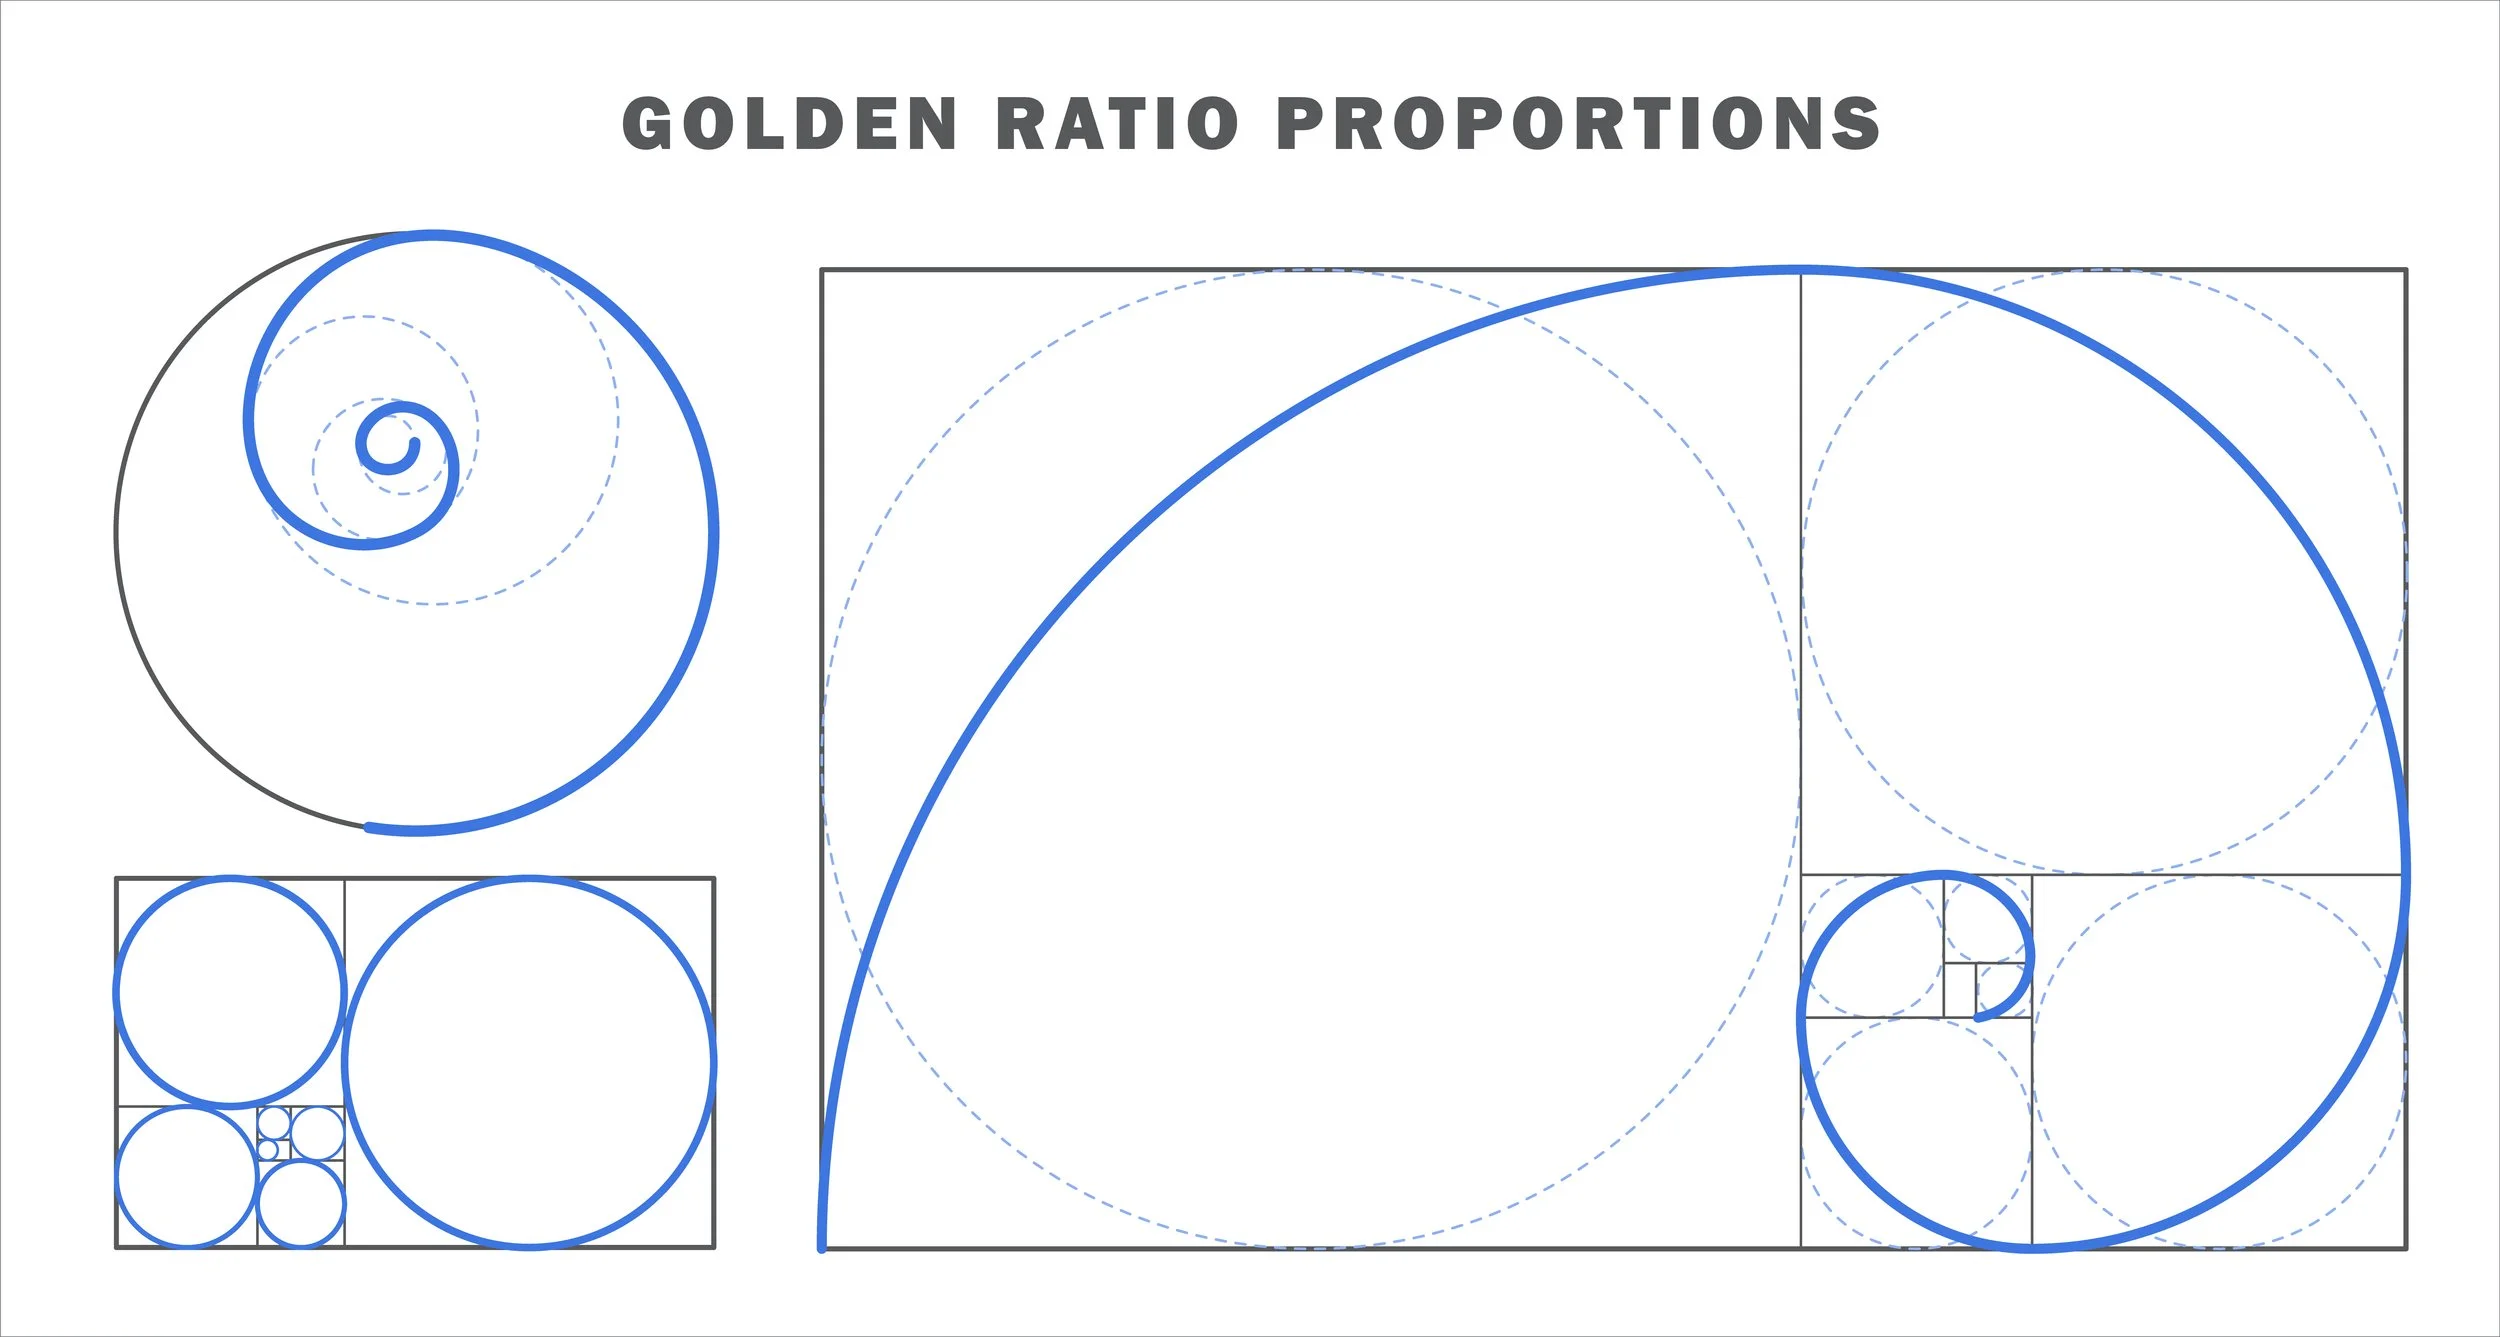
Golden Ration is a compositional technique that involves dividing the frame into sections using this ratio
The golden ratio is another grid - more organic than strict thirds. It creates a spiral path that feels natural.
Try the golden spiral for landscapes or portraits.
Some cameras have a golden ratio overlay - test it.
Use it as a guide, not a rule.


8. Color Balance - use color to support the story

Color balance is a technique that involves using color to create a sense of balance
Color can lead mood and focus. Complementary colors add punch; similar tones create harmony.
Look for a color contrast between subject and background.
Keep backgrounds simple when the subject has strong color.
Think about color temperature - warm vs cool light affects mood.


9. Contrast - create drama and focus

Contrast is achieved through differences in color, tone, texture, or shape
Contrast in tone, texture, or size helps the main element stand out.
Place dark subjects against light backgrounds or vice versa.
Use texture differences - smooth skin vs rough concrete.
Try black-and-white to study tonal contrast.


When using contrast, consider the colors, tones, and textures within the image. Look for opportunities to create a difference between elements within the image, such as placing a dark subject against a light background or using a brightly colored object against a neutral background. Experiment with different contrast techniques to find the most effective way to create a sense of drama and tension within your images.
10. Practice - then break the rules on purpose
These techniques are tools. Use them until they become second nature. When you know the rules well, you’ll spot the best moments to ignore them.
Shoot the same subject three ways using different techniques.
Compare and note which versions communicate best.
Keep a folder of “what works” for reference.


Why I Keep Returning to These Tips
Gear improves, but better composition is what made my photos stronger. These are some tips I use when I feel stuck or when I want to push an image further. Practicing them shifts how I see a scene - and that’s the real skill.
Quick FAQ - short answers people search for
What composition tip is easiest for beginners? - Turn on gridlines and use the rule of thirds.
When should I break the rule of thirds? - When symmetry or centering tells the story better.
Can I use these tips with a smartphone? - Yes - framing, negative space, and leading lines work very well on phones.
Try this exercise today
Pick one technique - rule of thirds or leading lines - and shoot 10 frames using only that idea. Compare and pick the best 3. Doing this regularly trains your eye faster than reading alone.
If you want guided practice, I offer one-on-one tutoring where we work through these techniques with real shoots and feedback. See my work and contact details at www.imagesbyhafiz.co - I’ll help you apply these tips to your style.
Which technique do you want to practice next - negative space or leading lines?